Skip to content

Cart

Your cart is empty

Article: The Weak Nail Manicure

The Weak Nail Manicure

The Weak Nail Manicure

Thin or weak nails no longer have to limit your manicure’s lifespan. 

For those of us with thin or weak nails, achieving a salon perfect, durable manicure at home can sometimes feel like a distant dream. 

With our Weak Nails Kit we have provided the right products to help turn that dream into a reality. Here's your step by step guide after you have followed the correct prep. Ensure you are curing each coat under our Nail Lamp.


Step 1: Create a Rough Surface

Start by using The Soft Buffer to gently roughen the surface of your natural nails. This creates a better surface for the products to adhere to, ensuring your manicure stays put for longer. Remember, the goal is to create a slight texture, not to thin out your nails further, so be gentle!


Step 2: Harden the Nail with 2in1

Once your nails are prepped, apply one thin coat of our 2in1 Optional Base Coat and Extension Gel Adhesive, making sure to cap the free edge. "Capping" refers to the process of sealing the tip of your nail with polish, which significantly reduces chipping. Cure for 60 seconds.


Step 3: Strengthen the Nail with Builder Gel XL

Next, it's time to add some strength. Before application, wipe the applicator brush on the inside neck of the bottle to remove excess product. Apply a thin, even coat of the Builder Gel XL to your nails, ensuring full coverage. Cure for 60 seconds.


Step 4: Colour with your One Step Gel Polish

Now for the fun part—colour! Apply 2-3 thin coats of your chosen One Step Gel Polish, curing for 60 seconds after each coat. Thin coats are key to preventing peeling and wrinkling, ensuring each layer cures properly and evenly.


Step 5: Seal with Top Coat

Finally, apply our Optional Top Coat to seal in your colour. Again, remember to cap the free edge for maximum durability. Cure for 60 seconds. This ensures your manicure looks fresh for as long as possible.


Aftercare Tips

  • Hydrate: Keep your cuticles and nails moisturised with our Cuticle Oil. Hydration is key to maintaining strength.
  • Gloves: Wear gloves when doing household chores, especially when using chemicals or dishwashing, to protect your nails.
  • Be mindful: Avoid using your nails as tools.

By following these steps and tips, your nails will not only look fabulous but also feel stronger and more resistant to bending. With a bit of care and the right products, you can achieve and maintain the perfect manicure, no matter your nail type.

Read more

gel nail kit, australia, shellac nail kit, gel polish, uv nail lamp, led nail lamp, one step gel, peel off nail polish, false nails, fake nails, reusable, BIAB

Featured in: Urban List
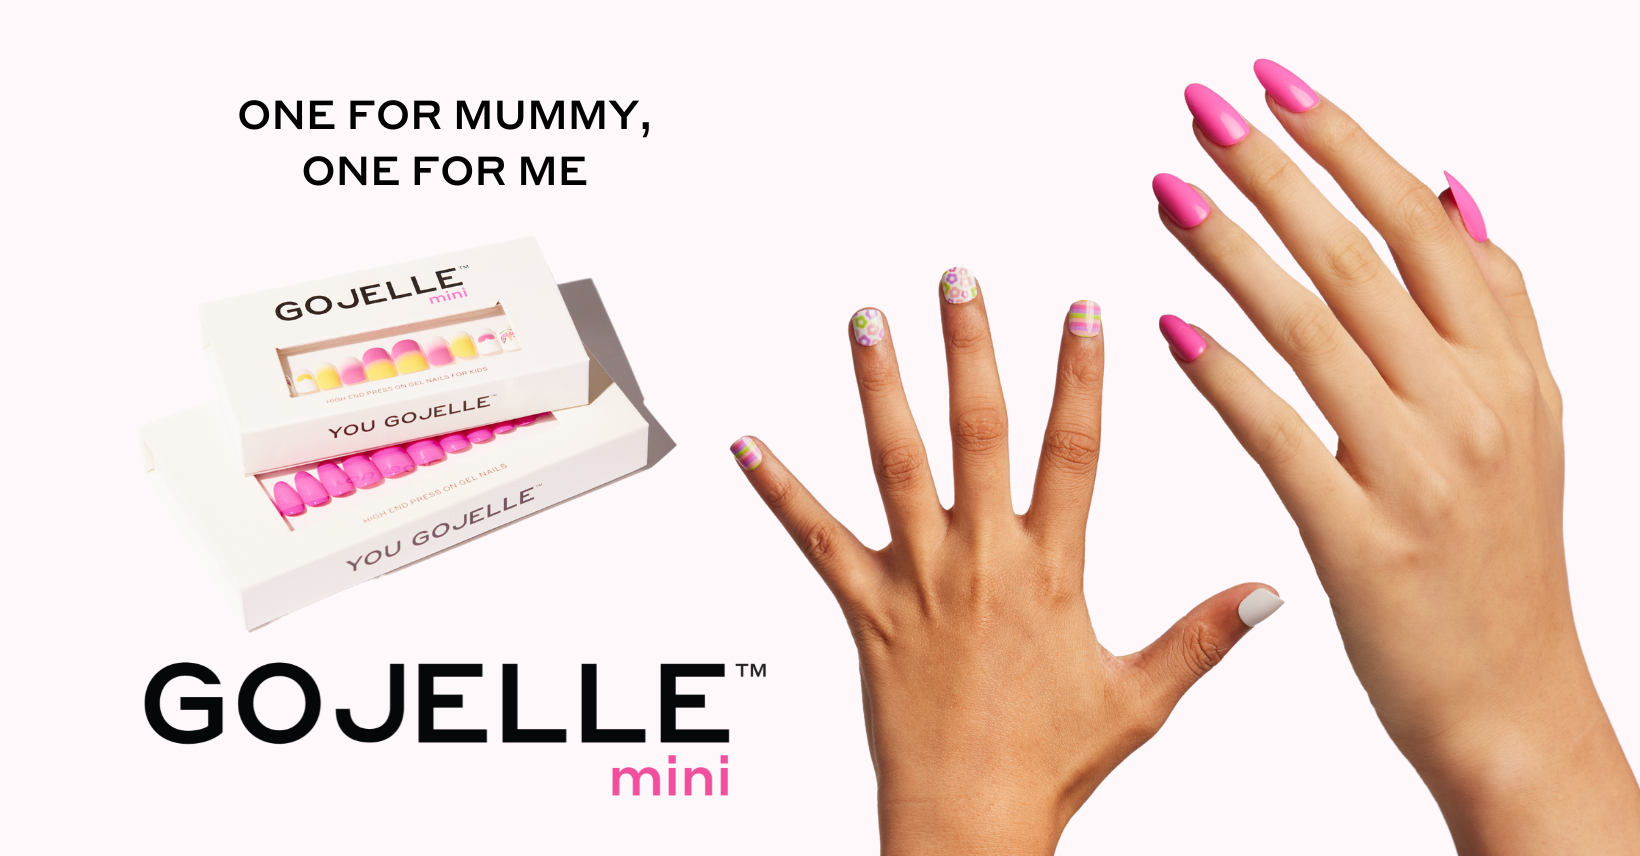
Thank you @Meggriffiths for featuring us in this months Urban List Article all about New Beauty Faves.    Alongside some classic brands, Gojelle has been featured as a newbie brand helping you achi...

Read more
gel nail kit, australia, shellac nail kit, gel polish, uv nail lamp, led nail lamp, one step gel, peel off nail polish, false nails, fake nails, reusable, BIAB
How To

Which Starter Kit is for Me?

As a beginner, selecting the perfect starter kit that aligns with your needs, budget, and nail type can be challenging. To assist you, we've detailed our three starter kits below to help you choose...

Read more